WordPress Websites: Policies for a Legal Website

Privacy Policy

Privacy Policy

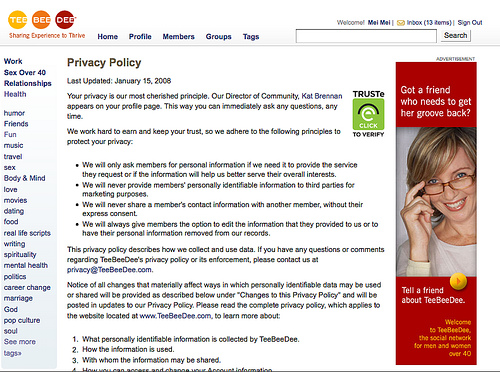
If you are going to create or maintain a WordPress website, you have to ensure that you have the policies necessary to have a legal website.  While there are legal requirements surrounding websites (such as Privacy Policy, Disclaimer, Earnings Disclaimer), Google also takes into account the existence of the legal policies when determining the value and ranking of a WordPress website.   The absence of such policies can signal a site that lacks substance or is engaged in illegal activity (such as misleading people about potential services or earnings).

You can go the hard road and hire a lawyer to write the necessary policies for your WordPress website to make it a legal website or alternatively you can access a WordPress Plugin designed specifically for this purpose.

[Image source: Sarah B Brooks]

WP Policies:  Free WordPress plugin for a legal WordPress website

The free WordPress plugin for incorporating policies for your WordPress site can be obtained here:

 WP Policies (http://wordpress.org/extend/plugins/wp-policies/)

This WordPress Plugin will automatically generate a range of policy statements to enable you to create a legal website and improve the value of your WordPress website in the eyes of Google and other search engines.

The free plugin comes with 10 policies at the moment and you can edit these to suit your own purposes:

  1. anti-spam policy
  2. disclaimer
  3. DMCA notice
  4. e-mail policy
  5. earnings disclaimer
  6. external links policy
  7. medical disclaimer
  8. privacy policy
  9. terms of use
  10. testimonial disclaimer

Often you will find that a set of policy statements will come with other purchases that you make (for example, if you purchase the software for a membership site as I did with my personal productivity site).  You can use these alternative policies if you prefer and it is just a matter of editing the ones provided with the WordPress Policies Plugin.

Installing WP Policies for a legal WordPress website

You can install the free WP Policies plugin by following the tips I offer in my post, How to Install a WordPress Plugin

You need, however, to check the permission setting for the folder where the default policies are stored before activating the plugin.  The instructions for this and for the overall setup of the legal policies are included as a text file with the plugin when you upload it.  These instructions show you how to add the variable fields for the policy statements (such as Company, address, email and phone number), that are added automatically when you ‘import’ the default policies (Step 4 in the Instructions).

You can delete or deactivate any of the policy pages you do not want to display by clicking on “Pages” in the Dashboard of your WordPress blog and either ‘trashing’ the page or changing the setting to draft (deactivates the page).

You can also display the pages in the footer by adding the code provided to the footer.php file of your WordPress Theme (Step 6 in the instructions) – see illustration in the footer to SmallBusinessOdyssey.

It is important to make sure your WordPress website is a legal website by adding the relevant legal policies – the WP Policies WordPress Plugin gives you an easy way to do this.

How to Install a WordPress Plugin

wordpress plugin menu

A WordPress Plugin is software that extends the functions of the basic WordPress program.  Plugins enable you to import or export information, increase the security of your blog, enhance search engine optimisation (SEO) and undertake an endless range of tasks designed to improve the functionality of your WordPress blog.   When I last looked there were over 17,00 plugins in the WordPress Directory (with over 235 Million downloads).

Installing a WordPress Plugin

WordPress makes it very easy to install plugins.  There are a series of steps you can follow which are guaranteed to work 95% of the time, so have a go without fear.  I will list out the steps here, so you can follow easily.

Step 1: Download the WordPress Plugin to your computer

To locate a WordPress Plugin, you can visit the WordPress Directory, search available plugins from within the admin area of your blog or undertake a Google search for the specific WordPress Plugin you are looking for. Many WordPress Plugins are free but some of the more sophisticated ones have a fee.  Important Note: For most plugins you will download a zip file which you should place in a designated folder on your computer (I call mine “WordPress Plugins”).

Step 2: Upload the WordPress Plugin to your blog

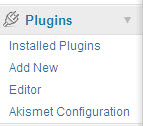
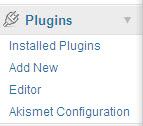
There is a Plugin Section in the Admin menu (yourblogURL/wp-admin) of your WordPress blog.  As the following image shows, the options available under this menu section are “Installed Plugins”,  “Add New”, “Editor” and “Akismet Configuration”.   Akismet is one of the installed plugins that comes with your basic WordPress blog and is designed to handle comment spam.

wordpress plugin menu


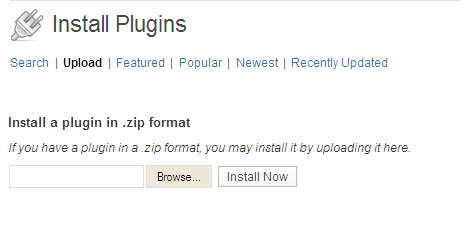
You need to click on the “Add New” option and the following image will display.  Here I have subsequently clicked on “upload” (bolded) to start the upload process:

upload WordPress Plugin

You then use the “browse” button to locate the zip file for the WordPress Plugin on your computer.  Once you have highlighted the file in the relevant folder on your computer, you press the “INSTALL NOW” button.  Note:  WordPress Plugins are usually uploaded as zipped files (do not unzip the file unless specifically instructed to do so by the developer).

Step 3:  Activate the WordPress Plugin

You need to make sure you click the “activate” button once you see that the Plugin has been successfully uploaded.  This activate button effectively integrates the Plugin with the WordPress Program.   Once a plugin has been uploaded, it is added to the Installed Plugins list.

Step 4: Read the WordPress Plugin instructions carefully

Each Plugin comes with its own set of instructions re setup and operation.  In most cases, you will need to complete some data fields to specify what options you want.  For example, in the installed plugin listing for the All in One SEO Plugin you will see this set of instructions/options:

“Out-of-the-box SEO for your WordPress blog. Options configuration panel | Upgrade to Pro Version | Donate | Support | Amazon Wishlist

WordPress Plugin can open up a whole new world of functionality for your WordPress blog and enable you to automate many tasks associated with blog post and comment management, marketing of your small business online and presentation of information to readers and the search engines.