
A WordPress Plugin is software that extends the functions of the basic WordPress program. Plugins enable you to import or export information, increase the security of your blog, enhance search engine optimisation (SEO) and undertake an endless range of tasks designed to improve the functionality of your WordPress blog. When I last looked there were over 17,00 plugins in the WordPress Directory (with over 235 Million downloads).
Installing a WordPress Plugin
WordPress makes it very easy to install plugins. There are a series of steps you can follow which are guaranteed to work 95% of the time, so have a go without fear. I will list out the steps here, so you can follow easily.
Step 1: Download the WordPress Plugin to your computer
To locate a WordPress Plugin, you can visit the WordPress Directory, search available plugins from within the admin area of your blog or undertake a Google search for the specific WordPress Plugin you are looking for. Many WordPress Plugins are free but some of the more sophisticated ones have a fee. Important Note: For most plugins you will download a zip file which you should place in a designated folder on your computer (I call mine “WordPress Plugins”).
Step 2: Upload the WordPress Plugin to your blog
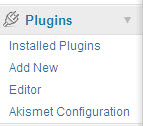
There is a Plugin Section in the Admin menu (yourblogURL/wp-admin) of your WordPress blog. As the following image shows, the options available under this menu section are “Installed Plugins”, “Add New”, “Editor” and “Akismet Configuration”. Akismet is one of the installed plugins that comes with your basic WordPress blog and is designed to handle comment spam.

You need to click on the “Add New” option and the following image will display. Here I have subsequently clicked on “upload” (bolded) to start the upload process:

You then use the “browse” button to locate the zip file for the WordPress Plugin on your computer. Once you have highlighted the file in the relevant folder on your computer, you press the “INSTALL NOW” button. Note: WordPress Plugins are usually uploaded as zipped files (do not unzip the file unless specifically instructed to do so by the developer).
Step 3: Activate the WordPress Plugin
You need to make sure you click the “activate” button once you see that the Plugin has been successfully uploaded. This activate button effectively integrates the Plugin with the WordPress Program. Once a plugin has been uploaded, it is added to the Installed Plugins list.
Step 4: Read the WordPress Plugin instructions carefully
Each Plugin comes with its own set of instructions re setup and operation. In most cases, you will need to complete some data fields to specify what options you want. For example, in the installed plugin listing for the All in One SEO Plugin you will see this set of instructions/options:
“Out-of-the-box SEO for your WordPress blog. Options configuration panel | Upgrade to Pro Version | Donate | Support | Amazon Wishlist”