Google has begun to give a social ranking to websites and a key element in that ranking is the Google+ review. So if you have not got any reviews for your Google+ Local website, now is the time to start. There are some traps in this, so I thought I would create this post on how to write a Google+ review.
Google has become a lot stricter about reviews on Google+ in order to stamp out false reviews (e.g. reviews written by website owners themselves or by people paid to make up reviews).
Google’s new rules for reviews on Google+ are:
- you must have a Google+ account and be signed into your account to leave a review
- you cannot use nicknames or be anonymous
- your review will automatically be public with your name attached (on Google+ and possibly on search engine results).
How to create a Google+ review – the steps
The steps to create a Google+ review are quite simple, but there are a number of them and it is important to follow them closely to maximize the benefit of your Google+ review.
1. Log into your Google+ account
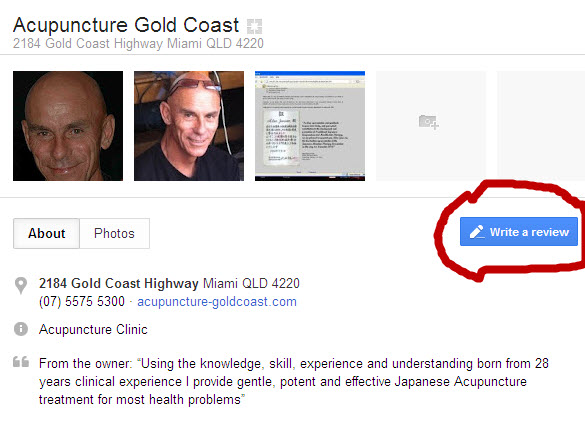
2. Access the Google+ account of the website you want to review. If you don’t already know the web address, you can search for this via Google by entering the name of the business and “Google+”. Alternatively, if you search on a related keyword, you could access the Google+ account from the search result entry as in this illustration of Acupuncture Gold Coast:
3. CLICK THE BLUE BUTTON for “Write a Review”
This button is in the top right hand corner as illustrated in this Google+ account for Alan Jansson’s Japanese Acupuncture clinic on the Gold Coast:
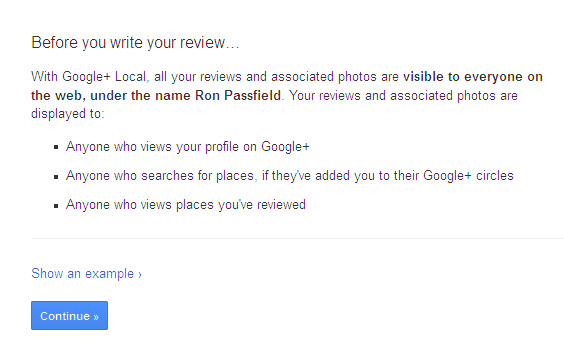
4. READ GOOGLE’S WARNING about going public and Click “continue”
Google will immediately advise you that your review will be public with your name attached. Here is the warning I received when I clicked the “write a review” button;
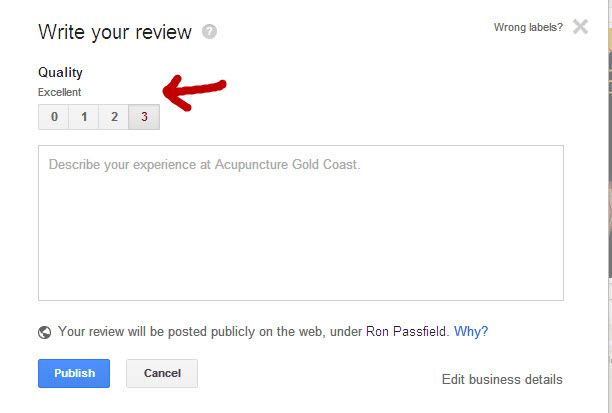
5. WRITE YOUR REVIEW and RATE the business/service – 0, 1, 2, or 3 (where 3 equals excellent)
It is important to record your rating as Google takes this into account when determining the social score of a website and overall ranking. You can see the ranking options illustrated below along with the write-a-review block:
6. HIT the PUBLISH BUTTON
The publish button is illustrated in the image above.
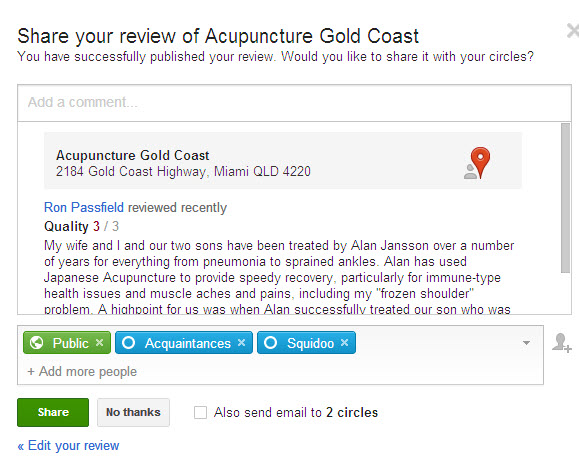
7. SHARE YOUR REVIEW – ADD CIRCLES and HIT “SHARE”
Google gives you the option of informing your circles of your completed review. Indicate which of your own Google+ circles you want to notify about your review. Going public is not optional. However, you can choose what circles you want to be informed of your Google+ review (so this is a viral feature if you choose to use it).
When you click “add more people” you will be given a drop-down menu to indicate who else (which circles) you want to share your review with.
Here’s an example from my review of Acupuncture Gold Coast, an acupuncture clinic run by Alan Jansson who has provided acupuncture services to my family over many years:
DON’T FORGET TO CLICK THE “SHARE” BUTTON – then you are finished!
It seems a long process but the steps are simple. It is important that you don’t attempt to dupe the system or take shortcuts. I’ve provided this post on how to write a Google+ review so that you can offer your service provider/ offline client the maximum benefit from Google+ reviews.


