One of the easiest ways to leverage your blogging, is to create your own small business ezine. An ezine is basically an email newsletter where you share articles, news and blog posts with members of your mailing list (customer list). This approach to small business marketing serves multiple purposes and achieves leverage on a number of levels.
Your regular small business ezine enables you to maintain contact with your customers, educate them about your products and services and offer free information and advice. Most email service providers offer ways to further leverage your ezine via RSS feeds and automatic posts to social media sites like Twitter and Facebook.
If you are blogging regularly, you are creating the content for your ezine. If you blog daily, you will be able to provide a small business ezine of considerable substance.
How to use your blogging in your small business ezine
If you blog regularly, you can easily create an ezine from your blog posts. Since I blog daily, I send a weekly ezine to my mailing list covering a number of posts around a theme, e.g. Squidoo or LinkedIn. You need to decide the frequency of your small business ezine based on the regularity of your blog posts, the nature of your business and the kind of information you are offering.
Most autoresponders will replace the blog links in your email with their own generated links (if you specify that you want open rates and click-through-rates measured).
Another option is to use the URL shortener bitly.com to shorten your blog links. The advantages of this approach are that you can share each individual shortened link automatically with your Facebook and/or Twitter account and you can also get statistics on click-through-rates on the Bitly link. It is a good idea to add a comment (like a status update) before you share your link on Bitly.
Blogging has lots of benefits, not the least of these is that it provides you with content to share with your mailing list via your small business ezine.
When I discussed Webmaster Tools earlier, I mentioned the need to create a sitemap for your website and submit it to Google. I will discuss how to do the creation and submission of a site map in this post because it is critical to the indexing of your website by Google and determines how your website will be found through search queries on Google (and other search engines).
A sitemap is basically, as the name suggests, a map or directory of your website, so that the structure and priority of the files on your website can be displayed for easy access by the search engines. You can see from the sitemap extract above that the sitemap for Small Business Odyssey has a hyperlinked list of files, a priority rating (percentage) and a frequency rating (to tell the search engines how frequently to index that part of the website).
Why create a sitemap and why submit it to Webmaster Tools?
Well, in non-technical language, it seems that the Google Bots (robots that crawl your website) are lazy ‘creatures” and do not go out of their way to properly index your site for the Google search engine. They take the easy way out – they only go where the path is clearly laid out for them. They don’t like deadends (broken links) or confused pathways (disconnected files randomly located). When I look at how Google is currently indexing my Small Business Odyssey blog, I am even more convinced of how lazy the Google Bots are – it seems that they need to be spoon-fed the information, otherwise they do a poor job of indexing your website.
So the primary reason for creating a sitemap for Google is to enable the Google Bots to comprehensively index your website. Otherwise, a lot of your website may not appear in Google’s index and will not be found by Internet searchers. Google admits as much by this comment on Webmaster Tools:
Submit a Sitemap to tell Google about pages on your site we might not otherwise discover.
Creating an XML Sitemap
This brings us to the creation of a sitemap. I am suggesting that you create this sitemap initially as a .XML file because it is easy for the lazy Bots to read completely. This sitemap format basically lets the Google Bots into the back engine room of your site and shows them around – where files are located and how they are linked by type (home page, static pages, dynamic pages, categories, tags).
If this post appears too technical for you, just make sure that your Webmaster has created an XML sitemap for your website and submitted it to Google.
Here are the steps for creation of your XML sitemap:
Make adjustments to the default settings (if you wish)
Click ‘create sitemap’ and you will very quickly have a site map and a stated location (URL) for your sitemap.
The beauty of this WordPress Plugin for creating Google XML Sitemaps is that it offers multiple options in terms of settings, automatically submits the sitemap to Google, Ask.com and Bing search engines and updates automatically when you change a file on your website. So it is comprehensive and dynamic.
In terms of adjustments to default settings, most commentators suggest that you leave the defaults as they are – it certainly makes life simpler. However, I would suggest that you may want to change the default for ‘priority’ – the default setting tells the Google Bots to give priority to the posts that have the most comments. This may not be meaningful if you have a really new site. I have set up my priorities in the following order – home page, recent posts, static pages, older posts, categories and tags. I will change this as the Small Business Odyssey site becomes more established and generates more traffic and comments.
The other default setting you may want to change before you click the “create sitemap’ button, is ‘Change Frequency’. For example, the default setting tells the Google Bots to index your posts weekly. However, if you are creating blog posts on a daily basis, you should change the ‘frequency’ to daily. The Google Bots may ignore this suggestion (remember they are basically lazy), but it is better to at least express your wishes. Google’s own experts, such as Matt Cutts, tell us that the more frequently you update your site with relevant information, the more often the Google Bots will crawl your site and the deeper (more thoroughly) they will index your website.
I’ve made a few adjustments to the priority and frequency default settings for my XML sitemap and you can see the result here:
Here’s a YouTube video that simplifies the whole process and shows you exactly what to do (there are no adjustments to defaults and the WordPress Plugin is downloaded directly to the Admin panel via the built-in Plugin search facility):
How to submit your XML sitemap to Google’s Webmaster Tools
You might wonder why we need to do this extra step as the WordPress XML Sitemap Generator automatically submits your sitemap to Google (and to Bing and Ask.com). Well, I think it comes back to our lazy Google Bots again – they don’t go out of their way to find the sitemap, so you have to put it in front of them! If you check out the screenshots below, you will also see how Google takes up the information from the sitemap on Webmaster Tools and begins to integrate it into its index. So submitting the sitemap to Google’s Webmaster Tools is a way to get direct access to Google’s index (although it may take some time for all of the information to be indexed).
The process of submission of your sitemap to Google’s Webmaster Tools is very simple:
enter your sitemap address where indicated (see image below).
When you first submit your sitemap, the above image will appear with the messages ‘submitted URLs – O’ and “index count pending’ (and status shown as ‘in progress’). Take heart, this is Google trying to identify all your files from the sitemap and integrating them into their index. After some processing time, you will see the following image that indicates successful submission:
So this indicates that Google has taken on board your website pages (URLs) and has loaded them into their index. The actual indexing in terms of search terms (keywords) will occur over an unspecified period (you can’t rush the Google Bots).
Creating and submitting an XML sitemap to Google’s Webmaster Tools is critical for small business marketing because it ensures effective indexing of your website so that Internet searchers can find your website through your targeted search terms (keywords).
In a previous post, I discussed how to register with Google’s Webmaster Tools and how to identify the results for search queries that bring people to your website. The search queries results may not be what you were expecting and may, in fact, be quite disappointing. So why would this be, given all the hard work you have put into writing content for your site?
The search queries results provide invaluable data about your site and how it is viewed by Internet searchers. Before you do anything else, just check the filters (e.g. geography) that you have used to report the data. It may be that you have excluded a search query from your results because of the filters you have used in reporting the search queries results.
One of the core reasons that your search queries results will differ from your expectations is the relevance of both your content and your site description.
How to improve your search queries results in Webmaster Tools
Let’s focus on relevance because that is the key issue determining whether your site gets included in Google’s search queries results for a particular query.
It may be that Google has not been able to find enough content on your site that is both useful and relevant to Internet searchers who have used a particular search query. If you are unfocused on your site, trying to cover multiple topics or unrelated topics, both Internet searchers and Google will be confused. As I mentioned in an earlier post, focus is so critical to your online results and your small business marketing success.
So here are some hints to improve the relevance of your content:
Focus on your reader – what is their level of understanding of what you are discussing on your site?
What language do your readers use to describe their problems/issues? – you can outpace your reader with your own understanding of a particular issue
Be conscious of your marketing style, particularly if you are in the coaching or consulting business
Check out Google AdWords Keyword Tool to see what terms people are using to search for information in your niche area – you will often be surprised! (make sure you sign in with your Google account details to get more complete results)
Visit blogs that are related to your niche to see what topics people are discussing, the language they are using and the problems/issues they are experiencing (take particular note of the blogs that have lots of comments)
Put yourself in your reader’s shoes – what would you be experiencing?, what kind of help would you need?, what would you be talking about?
Check out your site’s description as it appears on the Google search queries results – is your site description relevant to what you write about? (if not, change your site’s ‘description meta tag’ or get someone to change it for you).
Just focusing in on the relevance of what you write, and how you write, can go a long way to improving your search queries results.
Google’s Webmaster Tools (GWT) show you clearly how Internet users find your website through Google’s search results. You can learn, for example, what search terms result in your site being displayed and which of these are the top queries for your website.
Registering with Google Webmaster Tools and verifying your website
You need to visit Google’s Webmaster Tools site and sign in using your Google account. This is the image you will see when you visit the site:
Just click on the ‘Sign in to Webmaster Tools’ button and follow the instructions to enter username and password. Once you are on the site, you will see a button, ‘ADD A SITE’ and you will be able to add the web address (URL) of your website.
Before any results are reported, you will need to verify that you are the owner of the website. Google Webmaster Tools explains how to do this and one of the options is to copy a verification file to your website (so that Google can check that you actually have Webmaster rights/access to the site you listed).
Once you are verified, you will then need to be patient as Google takes some time to crawl your site and start reporting results. I would give it a few days if you want to get anything meaningful. The Google bots take holidays too – they don’t visit your site every day (unless your site is a really top ranked site or is updated daily and you let Google know about it).
What the Webmaster Tools tell you about how people find you in Google search results
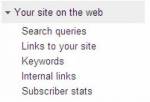
Webmaster Tools provides information to show you how your site is seen on the web – it covers search queries, links to your site, keywords, internal links and subscriber statistics. This information is accessible via the left hand menu:
What I want to focus on in this post, is the ‘search queries’ information and its implications. If you click on “search queries” in Webmaster Tools, you can find out valuable information about your website:
Queries: the total number of different search queries in Google that resulted in your site being displayed; this is the number of search terms that generated a listing of your site in Google’s search results (for the period you specify).
Query: a search term used by an Internet searcher that resulted in your website being listed in the Google search results; Google lists the top search terms (in descending order of frequency) that result in your website appearing in Google’s search results.
Impressions: the number of times one of your web pages appears in the Google search results for viewing by someone who searches on Google; Google gives you the total number of impressions ordered by query, along with the percentage change over the previous period.
Clickthrough Rate (CTR): how many times your website impressions (appearances in Google’s search results) produced a click; Google expresses the clickthrough rate as a percentage (number of clicks as a percentage of number of impressions).
Average Position: what position on the search results your website appeared at for a specified query; Google expresses this as an average position and shows the change in terms of ‘+’ or ‘–‘ the number of positions (improvements in position are shown in green).
So through the Webmaster Tools you can learn the total number of Google ‘queries’ that resulted in your site being displayed. You can establish what Google search queries were used to locate your site and which of these search terms generated the most traffic. You can also establish which search terms resulted in the most clicks. The other valuable piece of information is your average page rank for a particular query (which will impact heavily on your impressions and clickthrough rate).
In the following diagram, I show how Google illustrates these results (this is the result over two days for my new site, a day after I registered the site on Webmaster Tools):
To access this representation of your search queries results, you click on ‘more’ at the end of your ‘query’ listing and the illustration will appear. The image above is for ‘top queries’ and the illustration below is for ‘top pages’ (you can choose these options by using the tabs at the top left).
At the top on the left hand side, there is a button ‘Filters’ that allows you to set parameters for the displayed information, e.g. by geography.
Mining the riches of Webmaster Tools
There is a lot more to Google’s Webmaster Tools than at first meets the eye. As you go deeper into this Google tool, you can find a rich store of information that can help your site get indexed better by Google, crawled more often by the Google bots, displayed more frequently in search results and visited more often – it’s up to you to tell Google what you want.
In subsequent posts, I will explore some of the things that you can do based on other information that is available in Google’s Webmaster Tools:
What to do if you don’t like your search query results shown on Webmaster Tools
How to improve Google’s indexing of your targeted keywords
How to improve backlinking for your website
What to do to create more internal links
How to create and submit a sitemap
What to do about Google’s diagnosis of your website.
These topics alone demonstrate how important it is to use the Webmaster Tools to understand how people find your site on Google and how Google actually ‘sees’ your site.