Watch the Visitors to Your Website!

boost website traffic

boost website traffic


A new WordPress Plugin, WPClicks, enables you to watch your website traffic.  You can literally see where your visitors go on your site and in what order they visit your web pages.

This very clever and useful WordPress Plugin even produces a video so you can visually track what pages your visitors viewed and in what sequence.

WP Clicks also provides web traffic stats in terms of direct, referred and search traffic.  You can see the visitors who came to your site directly (entered your web address in their browser) or were referred from some other site or found your site through a search engine.  It identifies referring sites so that you can investigate where your referral traffic is coming from.

This intelligence enables you to edit your website to remove blockages, dead-ends and repetition.  It also gives you insight into what pages are of interest to visitors, so that you can adapt your pages accordingly.

Now small business marketers will be able to track the behaviour of their web traffic, improve their website design and enhance their conversion rates through the new WordPress Plugin, WPClicks.

How to Install a WordPress Plugin

wordpress plugin menu

A WordPress Plugin is software that extends the functions of the basic WordPress program.  Plugins enable you to import or export information, increase the security of your blog, enhance search engine optimisation (SEO) and undertake an endless range of tasks designed to improve the functionality of your WordPress blog.   When I last looked there were over 17,00 plugins in the WordPress Directory (with over 235 Million downloads).

Installing a WordPress Plugin

WordPress makes it very easy to install plugins.  There are a series of steps you can follow which are guaranteed to work 95% of the time, so have a go without fear.  I will list out the steps here, so you can follow easily.

Step 1: Download the WordPress Plugin to your computer

To locate a WordPress Plugin, you can visit the WordPress Directory, search available plugins from within the admin area of your blog or undertake a Google search for the specific WordPress Plugin you are looking for. Many WordPress Plugins are free but some of the more sophisticated ones have a fee.  Important Note: For most plugins you will download a zip file which you should place in a designated folder on your computer (I call mine “WordPress Plugins”).

Step 2: Upload the WordPress Plugin to your blog

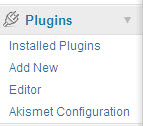
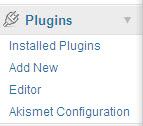
There is a Plugin Section in the Admin menu (yourblogURL/wp-admin) of your WordPress blog.  As the following image shows, the options available under this menu section are “Installed Plugins”,  “Add New”, “Editor” and “Akismet Configuration”.   Akismet is one of the installed plugins that comes with your basic WordPress blog and is designed to handle comment spam.
wordpress plugin menu


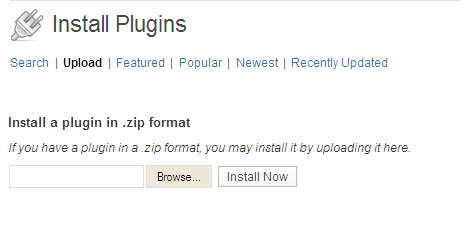
You need to click on the “Add New” option and the following image will display.  Here I have subsequently clicked on “upload” (bolded) to start the upload process:
upload WordPress Plugin

You then use the “browse” button to locate the zip file for the WordPress Plugin on your computer.  Once you have highlighted the file in the relevant folder on your computer, you press the “INSTALL NOW” button.  Note:  WordPress Plugins are usually uploaded as zipped files (do not unzip the file unless specifically instructed to do so by the developer).

Step 3:  Activate the WordPress Plugin

You need to make sure you click the “activate” button once you see that the Plugin has been successfully uploaded.  This activate button effectively integrates the Plugin with the WordPress Program.   Once a plugin has been uploaded, it is added to the Installed Plugins list.

Step 4: Read the WordPress Plugin instructions carefully

Each Plugin comes with its own set of instructions re setup and operation.  In most cases, you will need to complete some data fields to specify what options you want.  For example, in the installed plugin listing for the All in One SEO Plugin you will see this set of instructions/options:

“Out-of-the-box SEO for your WordPress blog. Options configuration panel | Upgrade to Pro Version | Donate | Support | Amazon Wishlist

WordPress Plugin can open up a whole new world of functionality for your WordPress blog and enable you to automate many tasks associated with blog post and comment management, marketing of your small business online and presentation of information to readers and the search engines.

Auto-Post with Posterous: Leverage Your Hard Work

Social Media sites for auto-posting with Posterous

Posterous enables you to broadcast your Posterous blog post (whether or not it was created by email, screen capture or onsite blogging).  You can also specify a target for a specific email post, e.g. twitter@posterous.com.

You can set up the specific accounts in the “autopost” area of your Posterous site to advise where to broadcast your blog post.  The above image lists the social media sites that you can auto-post to with Posterous.

Posterous, through email and screen capture blogging, gives you the power to leverage your online content (blog posts, articles, Squidoo lenses, Hub pages, videos. podcasts).  The autopost facility allows you to levrage your hard work in creating online content by simultaneous broadcast to other social networking sites.

At the time of writing, I have set up my site to post my Posterous blog posts (however created) to my Affiliate Marketing Coach blog (Blogger.com)  and to my Facebook site.    So you can set up a sequence of auto-posting that suits your style of operating and fits with your small business marketing strategy.

Here is an example of where Posterous has created an autopost to my Affiliate Marketing Coach blog from a Posterous screen capture post I created from this Small Business Odyssey blog:

The original blog post on Small Business Odyssey was posted to my Posterous blog via the screen capture bookmarklet.  I have added a comment and a link to my target URL (automatically hyperlinked) and Posterous has auto-posted the Posterous blog entry to my Blogger.com blog.

You have the option of letting Posterous post directly to each site you nominate or have it feed into one of your sites that is set up to auto-generate other posts.

You are limited only by your imagination with respect to the range of content that you can capture, and the means of achieving leverage.  In this example, my AudioBoo podcast is automatically posted to my Posterous account which in turn posts to my blog, Twitter and Facebook:

 Posterous and AudioBoo autopost

So there are a number of options for using the autopost feature of Posterous.  Here are three of them:

  1. Allow Posterous to autopost directly to your selected social media sites
  2. Allow Posterous to autopost to another site (e.g. Twitter) which in turn is set up to autopost to other sites (such as Facebook)
  3. Allow another site (e.g. AudioBoo) to autopost to your Posterous blog and setup the latter to autopost to selected sites.

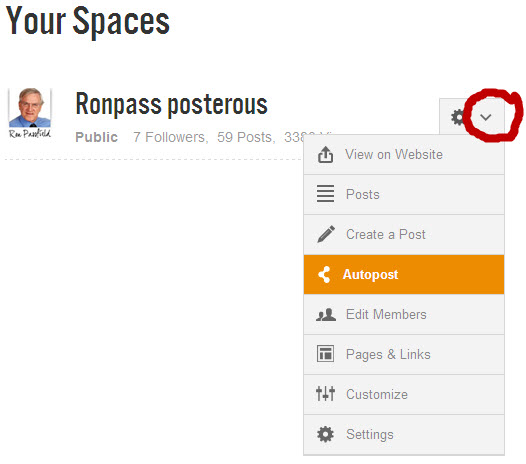
The autopost option is located under “Manage Spaces” – you need to click on the down arrow as highlighted in the image below so that the menu displays with the autopost option:

Posterous autopost

Posterous through its email blogging and screen capture blogging supports an array of options for auto-posting and creating leverage for your online content as part of your small business marketing.

Leverage Your Content with Cross-Posting on Posterous

Stradbroke Island photo

  Posterous leverage


One of the key features of Posterous is the ability to use their screen capture facility to cross post your content to your Posterous blog, even if you have published it elsewhere such as on your own website or blog..   This gives you the ability to leverage your writing and other online content.

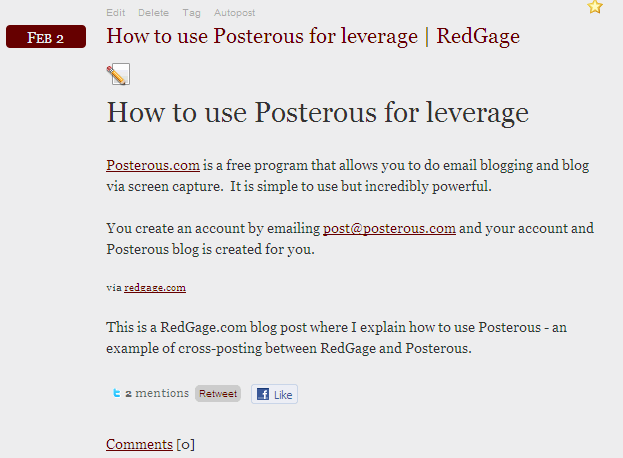
The concept here is to capture content from one of your sites and add it to Posterous for backlinking and promotion.  The image above shows how I have captured an entry from one of my RedGage blog posts and posted it to Posterous.  Ideally, you should add 100 words of comment and add a link back to your target site (which will appear as a hyperlink).

Here is another example where I have captured a Podcast from my AudioBoo Site.  What is great about the podcast capture is that the audio is playable on Posterous as the flash player is captured from the target site (so that it appears not just as an image on Posterous, but as an active MP3 player):

Posterous podcast

You could even screen capture and post a video created by a Joint Venture (JV) partner as I have done here in the spirit of collaborative marketing:

Posterous video

The beauty of this video screen capture on Posterous is that it displays as a streaming video and can be played on the site.

Posterous enables you to leverage your small business marketing online – blog posts, videos, podcasts, images and articles – by cross-posting from your other social media sites through the screen capture facility.

Screen Capture Blogging with Posterous

posterous screen capture blogging

posterous screen capture blogging

Posterous provides screen capture blogging in addition to the email blog discussed in my last blog post.

You can add the Posterous bookmarklet to your browser and you will have unlimited screen capture options to use as Posterous blog posts.  You can capture photos, video, podcasts and text to add to your blog.  The bookmarklet supports numerous sites such as YouTube, Dailymotion, Vimeo and Metacafe.  Posterous, through its screen capture technology, automatically tries to find flash embeds and large images so that your videos and podcasts can be played on your Posterous blog.

What you do is highlight the area of screen that you want to capture and click the Posterous button in your browser (you need to be logged into Posterous – you can stay logged in as an option).  There is an example of text capture from the 12SecondCommute website in the image at the top of this post.

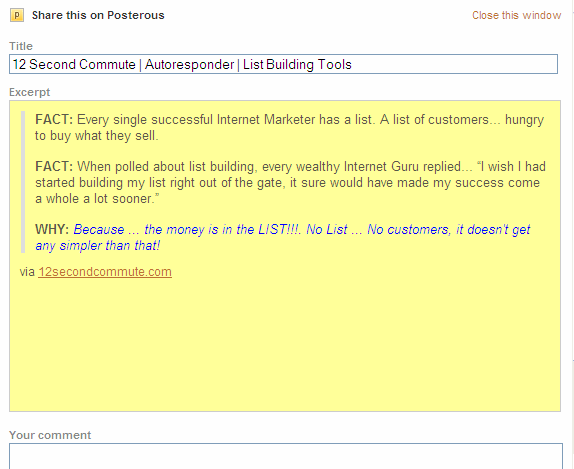
When you use the Posterous bookmarklet for screen capture you can add comments to the captured image together with a hyperlinked URL  Here’s an example of a text screen capture and the provision for a comment on the Posterous extract: 


Ideally, you would make a 100 word comment that is keyword rich and adds to the information in the screen capture window.  The comment would also include a link to your target website/blog.  Here’s an example comment created in relation to the text screen capture at the top of this post:

Posterous comment

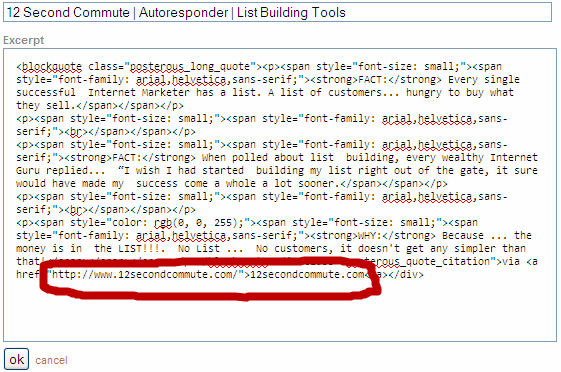
Posterous automatically records the URL of the screen capture and adds it as a hyperlink.  However, you can edit the screen capture and URL displayed before posting to Posterous.  You do this by clicking on the text/image displayed in the screen capture and this will result in a window displaying the HTML code for editing.  You can just highlight the relevant text or link and replace it with the desired information:

editing Posterous screen capture

Screen capture blogging with Posterous is another great option for small business marketing online as it is easy to use and is very versatile.